Materials Needed:
Pants
Sheet(s), depending on size and details
scissors
Straight Pins
Ruler/Measuring Tape
Sewing Machine
Step 1: How to fold your sheet. Fold the sheet in half the long way. Then fold again the long way. You will have 4 layers of fabric.
Step 2: Take a pair of pants that have minimal stretch to them but still fit comfortably. Fold them in half side seam to side seam. Line up the side seam with the folded edge. Cut around giving yourself about an inch out from the pants in all directions. Do not cut the fold.
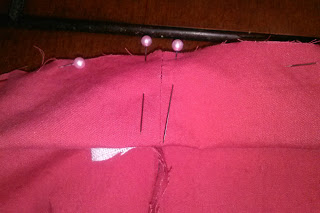
Step 4: Open pants allowing the seams you just made to match up in the center. Those have become your front and back seam. Now Pin along your inseam matching up what you have just completed.
Yes, I am pushing the lining up for the center seams.
Stitch using 1/2 seam allowance. I went back in with a 1/4 stitch as well. This is also where I added a little marker to show me which side was the bottom.
Step 5: It should be looking like a pair of short pants now! Now we try them on. Yes it should be a little snug over the bottom but we having not finished the waistband yet. Mark with a pin or chalk where you would like your waist to sit as well as the hem to end.
Sorry no pic for this step
Step 6: Take them off and measure the distance from your marking to the top. Double that and mark on the waist. Then cut that off. I know it seems confusing but just read along with me and it will get better. Fold the newly cut piece in half wrong sides facing each other and press. Then pin the pressed piece around the waistband raw edges to raw edges. You should have 3 layers of raw edging. Stitch as close as you can to the raw edge. Make sure your center seams are lined up.
Step 7: Cut 2 slits/holes equal distance from the center seam in the from on the left and right side. Take a Measurement of your hip where the Capri Pants will sit. Add that by half of your measurement. That is the length of your tie. The width of it is determined by how thick your band is at the top of your garment. Stitch together a tube and flip it inside out using your favorite method. I like to press my ends in and top stitch :). Feed the tie through the holes and make a cute bow of your choosing.

Step 8: Time for the hem. Going back to the marking of where you wanted the hem to be. Fold the bottom up to the line or mark you have and fold again. Press the seam. Then top stitch.
Step 9: And there you have a finished pair of Capri pants. My niece looks very excited to model.
Get creative and add extra flair to them. Pull out the double needle and stitch around the hem or even add cargo pockets on the side. I am adding pockets to the the front and little button tabs on the bottom sides.


Oh, super fabulous! Love the pants and the fact that they started out as a sheet! Very resourceful.
ReplyDelete